Offline capturing of full-body motion with the Vicon system
Note: This guide was written for Vicon IQ 1. I have no idea how much of it may apply to IQ 2.
Marker placement
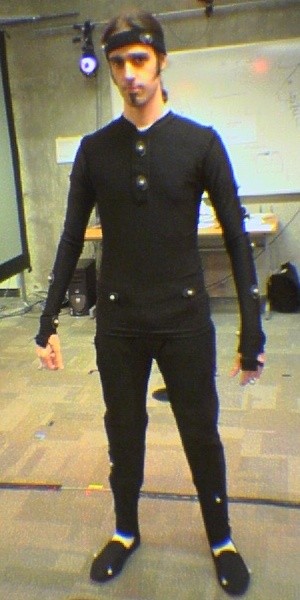
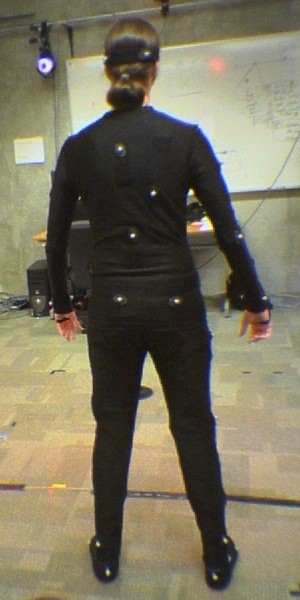
There are a few issues with this step. The full body suits are tiny. The picture of me to the right is in the XL suit. So plan on finding a way to get the markers on the target body using tape or some other method if the subject is much bigger than me. Even if you are dealing with someone who can fit in the suits, it's probably not too pleasant to ask a guest to wear it (when do we clean them?).
A fairly complete description of the marker names and placement can be found in the Vicon System Manual, in the Preparation section, starting around page 28. There are some typos, like the right leg has an extra marker for some reason. You could also load the HumanRTKM_V1.vst model in the Modelling section of Vicon IQ and display markers on it to get an idea of where they go, but it won't show the asymmetries that help autolabeling of points.
We also found that the skeleton tends to be very sensitive to the placement of the C7 and RBACK markers (the top marker on the spine and the marker on the right shoulder blade). The Vicon manual says to put the C7 marker on the prominent vertebra on the base of the neck, but this seems to be too high, causing the shoulders and arms to collapse downward. In the picture, we have C7 a little too low, which resulted in the head joint being in nearly the same position as the clavicle. The point is, if your skeleton is doing weird things, try adjusting your marker placement and recalibrating.
Capture a range of motion test
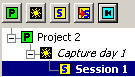
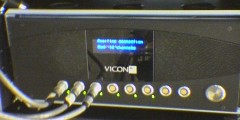
To capture motion data, you need to use the Vicon Workstation program (and make sure the Vicon system is on). When it is started, it will prompt you for a database. Click the New... button and give it a location (such as C:\, a folder will automatically be created), a name, and keep Animation Template.eni selected. Then click the Create button, and open the new database. You will be greated with an empty subwindow with a single clickable button in its upper left, showing a P on a green background. Click the button (to create a new project), then the next button on its right featuring a sun will become clickable. Click this (to create a new capture day), then the button with an S next to it (to create a new session). Now you may skip the next button (for a subsession) and click the last button, which will create a new take (if it doesn't respond, double click the session and try again--yeah, that's nice UI).
At this point, you may be warned that the camera calibration is more than 1 day old. If you are confident that the cameras have not been touched since the last calibration, you may safely ignore this. Otherwise, you will need to calibrate the cameras using the L bar and wand (sorry for not giving better documentation on camera calibration here, but this guide is already long enough).
A trial data capture
dialog will appear asking for all manners of information. All you need to do is enter something for the Reference, such as "ROM" for Range Of Motion. Click the Capture button. This will bring up a dialog with a big start button. Have your subject prepared in the center of the capture area with a T pose, and click to begin recording. The subject should move each joint through a full range of motion. It seems easiest to go through each joint independently, then go nuts moving around. When this is complete, you may stop recording and close Workstation.
Create a calibrated subject
Open Vicon iQ, and it should open the database you were working on in Workstation for you. In the Post Processing section, select the Pipeline tab on the lower right. The first thing that needs to be done is a CircleFit, Reconstruct, Trajectory operation. If this operation is in the pipeline, right click it and select Edit options from the menu (if the operation is not in the pipeline, add it by clicking the big purple plus sign first).
Set the two options for the minimum number of cameras to 2 (default is 3). If you don't do this, you will find that we don't have enough cameras available, so points tend to be lost very often in the 3D reconstruction. Click OK and right click on the operation in the pipeline, and select Run operation. This should run for a while, then it will give you
a nice 3D reconstruction (click the 3D Workspace button if you are still in the calibrated camera view). Navigation works as in Maya, use alt and mouse buttons to zoom, pan, and rotate.
If it appears that all the points were reconstructed reasonably for the first frame, click the Subjects tab. Click the Create Generic Subject (VST) button, which will bring up
a dialog to choose a model and marker set. For this guide, we will be using the HumanRTKM_V1 model. If you have something else in mind, you are on your own as far as modelling goes. Enter a Subject Name and click OK. Now comes the tedious part. Click the Labelling tab and set the mode to Sequence. In the Labels box, you will see a long list of labels that need to be bound to specific markers. Check the Vicon System Manual for a description of the marker names.
Click each marker to label it, starting with left forehead, right forehead, left back of head, and so on.
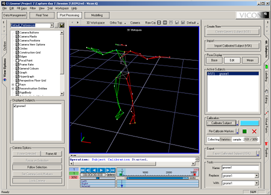
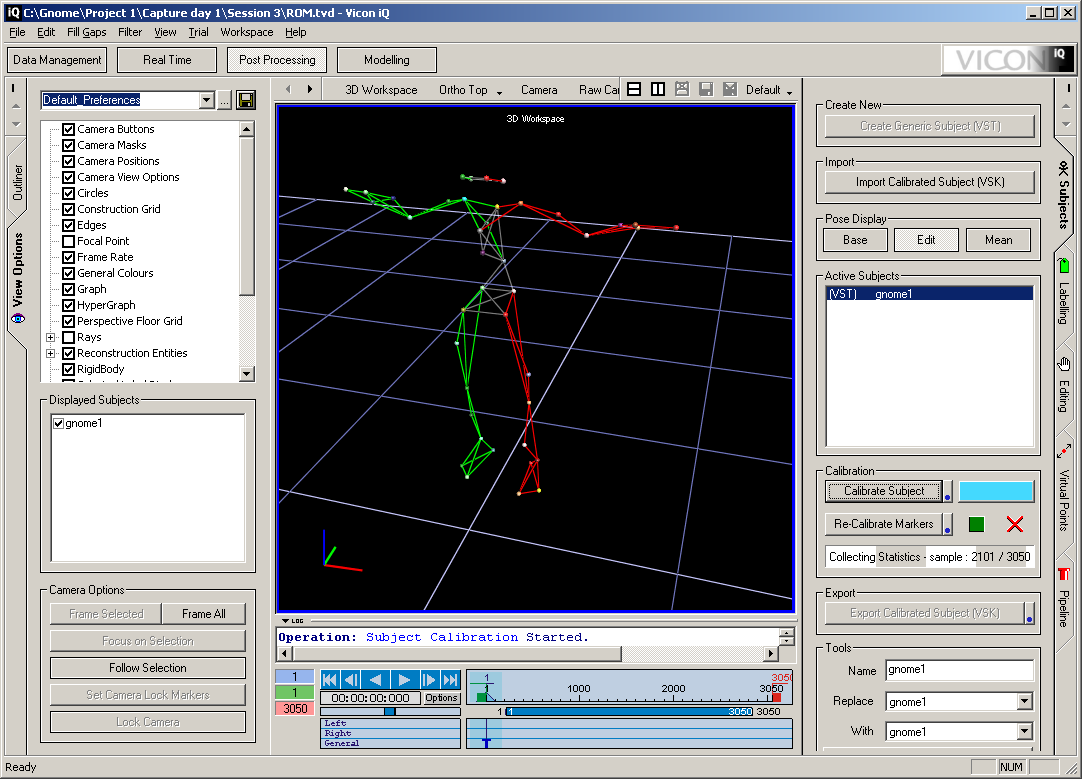
At this point, the Trajectory Info - Current Field box should show 41 labelled points and 0 unlabelled, with a nice looking set of sticks
like this, with red and green color coding left and right. Return to the Pipeline tab, and select the ROM Processing pipeline. Right click the Autolabel Range Of Movement operation, and run it. Now for more unrewarding, tedious work. Go back to the Labelling tab, and scrub the timeline until you find that a point becomes unlabelled. Relabel it, and continue scrubbing, and fixing points. At some places in the timeline, you will find that a point completely disappears. This is okay as long as it doesn't happen too much.
Once most of the unlabelled points have been fixed, go to the Pipeline again and run the Kinematic Fit and Trajectory Labeller operations. If those both finish with green checkmarks, you are almost ready to create a calibrated subject.
Click the Subjects tab one last time, and make sure you are at the first frame of captured data, which should be a T pose. In the Events box,
click the G button, then the T button below it. A blue T will appear in the timeline at the selected frame. Now,
now, you can click the Calibrate Subject button (use the blue circle next to it if you want to change the quality of the subject). When this finishes, click the Export Calibrated Subject (VSK) button.
Test the calibrated subject and capture new motion
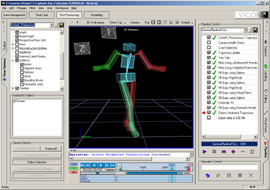
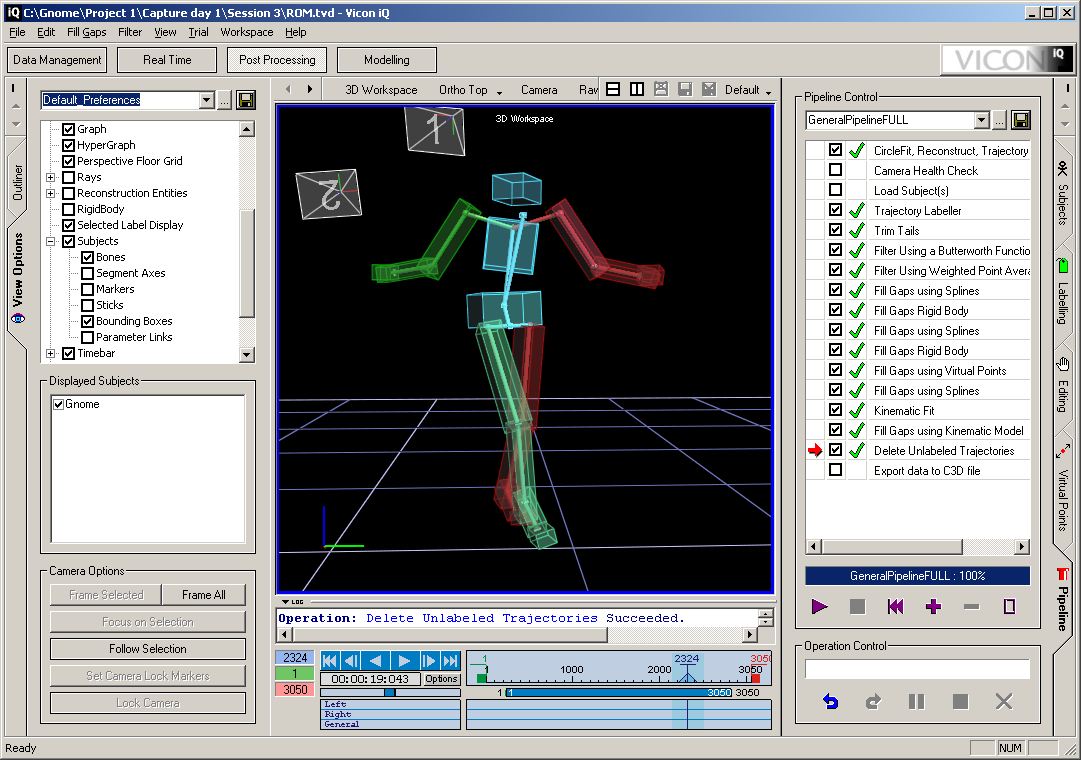
Close Vicon iQ, and select not to save. This is because you are going to test your calibrated subject on your range of motion test. Open Vicon iQ again, and open the range of motion take. In the Subjects tab, click Import Calibrated Subject (VSK), and select your new VSK file. Go to the Pipeline tab, and select GeneralPipelineFULL. If it is not available, just reproduce the operations given in the
image. For the CircleFit operation, set the minimum cameras to 2, as before. You may uncheck Camera Health Check, Load Subject(s), and Export to C3D file. Now simply press the purple play button, and wait for it to finish. When it's done, you should have bones that fit your motion well. If anything looks off, you're going to have to start all over again (consider checking camera calibration, marker placement, and perhaps camera masking).
If you are happy with the skeleton, go back to Workstation, and record new motion. You can then run the full pipeline on this motion in iQ with your calibrated subject, and you're done. You can save your trial (note they can easily take over 100 MB of disk space), or
export your motion to a V-file for use with Maya.
 Open Vicon iQ, and it should open the database you were working on in Workstation for you. In the Post Processing section, select the Pipeline tab on the lower right. The first thing that needs to be done is a CircleFit, Reconstruct, Trajectory operation. If this operation is in the pipeline, right click it and select Edit options from the menu (if the operation is not in the pipeline, add it by clicking the big purple plus sign first). Set the two options for the minimum number of cameras to 2 (default is 3). If you don't do this, you will find that we don't have enough cameras available, so points tend to be lost very often in the 3D reconstruction. Click OK and right click on the operation in the pipeline, and select Run operation. This should run for a while, then it will give you a nice 3D reconstruction (click the 3D Workspace button if you are still in the calibrated camera view). Navigation works as in Maya, use alt and mouse buttons to zoom, pan, and rotate.
 Close Vicon iQ, and select not to save. This is because you are going to test your calibrated subject on your range of motion test. Open Vicon iQ again, and open the range of motion take. In the Subjects tab, click Import Calibrated Subject (VSK), and select your new VSK file. Go to the Pipeline tab, and select GeneralPipelineFULL. If it is not available, just reproduce the operations given in the image. For the CircleFit operation, set the minimum cameras to 2, as before. You may uncheck Camera Health Check, Load Subject(s), and Export to C3D file. Now simply press the purple play button, and wait for it to finish. When it's done, you should have bones that fit your motion well. If anything looks off, you're going to have to start all over again (consider checking camera calibration, marker placement, and perhaps camera masking).